

As a provider of high - quality metal protective vents, I understand that properly connecting these vents to ducts is crucial for their optimal performance. In this blog post, I will guide you through the process of connecting a metal protective vent to a duct, ensuring that you get the most out of your ventilation system.
Understanding the Basics of Metal Protective Vents
Before we start the connection process, it's essential to know what metal protective vents are and their significance. Metal protective vents are designed to protect your duct system from environmental factors such as dust, debris, and moisture. They also help in maintaining proper air pressure and allowing for efficient air exchange.
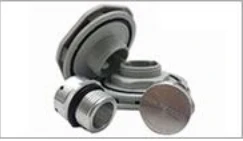
We offer a variety of metal protective vents, including Stainless Steel Ventilation Plugs, Protective Vents Snap - In, and Air Permeable Vent Plug. Each of these vents has unique features and is suitable for different applications.
Step 1: Choose the Right Metal Protective Vent
The first step in connecting a metal protective vent to a duct is to choose the right vent for your specific needs. Consider factors such as the size of the duct, the type of environment where the duct will be installed, and the required airflow rate.
If you are dealing with a high - moisture environment, a vent with good moisture - resistance properties like our stainless - steel ventilation plugs would be a great choice. For applications where quick installation is needed, the snap - in protective vents might be more suitable.
Step 2: Prepare the Duct
Once you have selected the appropriate metal protective vent, it's time to prepare the duct. Start by cleaning the end of the duct where the vent will be connected. Remove any dirt, dust, or debris that could interfere with the connection.
You may also need to measure the diameter of the duct accurately. This measurement is crucial as it will determine whether the vent will fit properly. If necessary, you can use sandpaper to smooth out the edges of the duct to ensure a tight and secure fit.
Step 3: Check the Vent
Before making the connection, carefully inspect the metal protective vent. Look for any damage or defects that could affect its performance. Check the sealing gaskets, if any, to make sure they are in good condition.
If you are using a vent with a filter, make sure the filter is clean and free from blockages. A dirty filter can restrict airflow and reduce the effectiveness of the ventilation system.
Step 4: Make the Connection
There are different methods for connecting a metal protective vent to a duct, and the method you choose will depend on the type of vent and duct you are using.
Flanged Vents
If you have a flanged metal protective vent, you can use bolts or screws to attach it to the duct. Place the vent flange against the end of the duct and align the holes. Insert the bolts or screws through the holes and tighten them evenly. Make sure not to overtighten as this could damage the vent or the duct.
Press - Fit Vents
For press - fit vents, apply a small amount of silicone sealant around the inside of the vent opening. This will help create a better seal. Then, carefully press the vent into the end of the duct. You may need to use some force, but be gentle to avoid damaging the vent or the duct.
Snap - In Vents
Snap - in vents are relatively easy to install. Simply align the snap - in features of the vent with the corresponding features on the duct. Press the vent firmly into place until you hear a clicking sound, indicating that it is securely attached.
Step 5: Test the Connection
After making the connection, it's important to test it to ensure that it is airtight and functioning properly. You can use a smoke test to check for air leaks. Introduce a small amount of smoke near the connection point and observe if the smoke escapes.
If you notice any leaks, you may need to tighten the bolts or screws, re - apply the sealant, or adjust the vent position.
Step 6: Maintenance
Once the metal protective vent is connected to the duct and is working correctly, regular maintenance is essential. This includes cleaning the vent and the duct periodically to prevent the buildup of dirt and debris.

Check the sealant and gaskets regularly and replace them if they show signs of wear or damage. Also, monitor the airflow rate and the performance of the ventilation system to detect any issues early.
Additional Tips
- When working with metal protective vents and ducts, always wear appropriate safety equipment, such as gloves and safety glasses.
- If you are unsure about any step of the connection process, consult the manufacturer's instructions or seek professional advice.
- Consider the overall ventilation system design. The connection of the metal protective vent should be integrated into the larger ventilation strategy to ensure optimal performance.
Conclusion
Connecting a metal protective vent to a duct is a relatively straightforward process if you follow the right steps. By choosing the right vent, preparing the duct properly, making a secure connection, and performing regular maintenance, you can ensure that your ventilation system functions efficiently and effectively.
We are committed to providing high - quality metal protective vents and support to our customers. If you have any questions about the products we offer or need assistance with the installation process, please feel free to contact us. We are more than happy to help you select the right vent for your application and guide you through the connection process. Start your procurement journey today and enhance the performance of your ventilation systems with our top - notch metal protective vents.
References
- Ductwork Installation Handbook, Industry Standards Committee
- Metal Ventilation System Design and Maintenance Guide, Ventilation Professionals Association