

Hey there! As a supplier of ECU Adhesive Vents, I've seen firsthand how crucial it is to ensure a secure bond during installation. In this blog post, I'll share some tips and tricks I've picked over the years to help you get the job done right.
Understanding ECU Adhesive Vents
Before we dive into the installation process, let's quickly go over what ECU Adhesive Vents are and why they're so important. ECU Adhesive Vents are small devices that are used to equalize pressure and prevent moisture buildup inside electronic control units (ECUs). These units are responsible for controlling various functions in vehicles, such as the engine, transmission, and brakes. If moisture or pressure imbalances occur, it can lead to malfunctions and costly repairs.
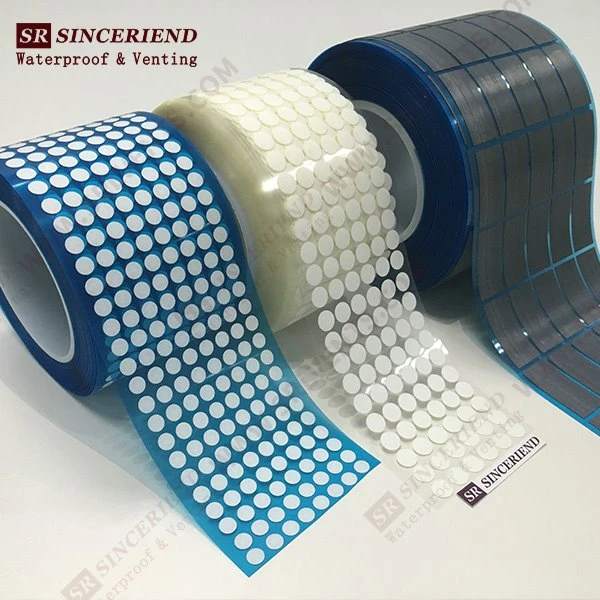
ECU Adhesive Vents work by allowing air to flow in and out of the ECU while keeping out water, dust, and other contaminants. They are typically made of a porous material, such as expanded polytetrafluoroethylene (ePTFE), which is both waterproof and breathable. Automotive ePTFE vents are designed to be adhesively bonded to the ECU housing, creating a secure and reliable seal.
Preparing for Installation
The first step in ensuring a secure bond when installing ECU Adhesive Vents is to properly prepare the surface. Here's what you need to do:
- Clean the Surface: Use a clean, lint-free cloth and a suitable cleaning agent to remove any dirt,油污, or debris from the area where the vent will be installed. Make sure the surface is completely dry before proceeding.
- Inspect the Surface: Check the surface for any scratches, dents, or other imperfections that could affect the bond. If necessary, sand or smooth the surface to ensure a flat and even surface for bonding.
- Choose the Right Adhesive: Make sure you use the adhesive recommended by the vent manufacturer. Different adhesives have different properties and are designed for specific applications, so it's important to choose the one that's right for your situation.
- Apply the Adhesive: Follow the manufacturer's instructions carefully when applying the adhesive. Use a small brush or applicator to apply the adhesive evenly to the back of the vent and the installation surface. Make sure to apply enough adhesive to create a strong bond, but not so much that it oozes out when the vent is pressed into place.
Installing the ECU Adhesive Vents
Once the surface is prepared and the adhesive is applied, it's time to install the vent. Here's how to do it:
- Align the Vent: Carefully place the vent on the prepared surface and align it with the mounting holes or markings. Make sure the vent is centered and level before proceeding.
- Press the Vent into Place: Apply firm pressure to the vent for at least 30 seconds to ensure a secure bond. Make sure the vent is completely seated and that there are no gaps or bubbles between the vent and the surface.
- Allow the Adhesive to Cure: Follow the manufacturer's instructions for curing time. This is usually 24 to 48 hours, but it can vary depending on the type of adhesive and the environmental conditions.
- Inspect the Bond: After the adhesive has cured, inspect the bond to make sure it's secure. Gently tug on the vent to see if it moves or comes loose. If there are any signs of a weak bond, remove the vent and repeat the installation process.
Tips for a Secure Bond
In addition to following the steps outlined above, here are some additional tips to help you ensure a secure bond when installing ECU Adhesive Vents:
- Use the Right Tools: Make sure you use the right tools for the job. A small brush or applicator is ideal for applying the adhesive, and a firm, flat object, such as a credit card, can be used to press the vent into place.
- Work in a Clean Environment: To prevent dirt and debris from getting between the vent and the surface, work in a clean, dust-free environment. If possible, wear gloves to prevent oils and contaminants from transferring to the surface.
- Follow the Manufacturer's Instructions: Always follow the manufacturer's instructions carefully when installing ECU Adhesive Vents. This includes using the recommended adhesive, applying the correct amount of pressure, and allowing the adhesive to cure for the specified amount of time.
- Test the Vent: Once the vent is installed and the adhesive has cured, test it to make sure it's functioning properly. You can do this by blowing gently on the vent to see if air flows through it, or by using a pressure testing device to check for leaks.
Troubleshooting Common Issues
Even when you follow all the steps and tips outlined above, you may still encounter some common issues when installing ECU Adhesive Vents. Here's how to troubleshoot them:

- Poor Bond: If the vent doesn't bond properly, it could be due to a number of factors, such as a dirty surface, incorrect adhesive, or insufficient pressure. To fix the problem, remove the vent, clean the surface again, and repeat the installation process using the correct adhesive and applying more pressure.
- Leaking Vent: If the vent is leaking, it could be due to a poor bond, a damaged vent, or a punctured adhesive seal. To fix the problem, remove the vent, inspect it for damage, and replace it if necessary. Make sure the surface is clean and dry before reinstalling the vent, and apply the adhesive evenly to create a strong seal.
- Airflow Problems: If the vent is not allowing enough air to flow through it, it could be due to a clogged vent or a damaged filter. To fix the problem, remove the vent and clean it using a soft brush or compressed air. If the filter is damaged, replace it with a new one.
Conclusion
Ensuring a secure bond when installing ECU Adhesive Vents is essential for the proper functioning of electronic control units in vehicles. By following the steps and tips outlined in this blog post, you can ensure a strong and reliable bond that will protect the ECU from moisture, pressure imbalances, and other contaminants. Remember to always follow the manufacturer's instructions, use the right tools and materials, and work in a clean environment.
If you have any questions or need further information about ECU Adhesive Vents, feel free to reach out. We're here to help you find the right solutions for your specific needs. Whether you're a car manufacturer, an automotive parts supplier, or a DIY enthusiast, we have the expertise and products to keep your ECUs running smoothly. Contact us today to start a discussion about your procurement of Waterproof Breathable Vent Plug and Rearview Mirror Vents. Let's work together to ensure the reliability and performance of your vehicles!
References
- Automotive Ventilation: A Guide to Best Practices, Automotive Ventilation Association
- Installation Manual for ECU Adhesive Vents, Manufacturer's Publication
- Understanding ePTFE Technology in Automotive Vents, Journal of Automotive Engineering